|
|
 |
Fan Art - 11/27/01 |
 |
Locked in a place where no one goes
"Lock the door, kill the light.
No one's coming home tonight.
The sun beats down and don't you know?
All our lives are growing cold, oh..."
|
 |
New Fan Art
|
 |
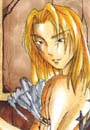
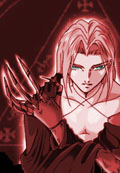 Sydney, Vagrant Story
Comments: Here I am again ^_~. Originally made for a friend, later retouched by messing up with the hue/saturation thingie and liking the result (specially the way his eyes stand out now) [Ink / Adobe Photoshop 5.5]
|
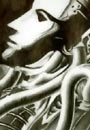
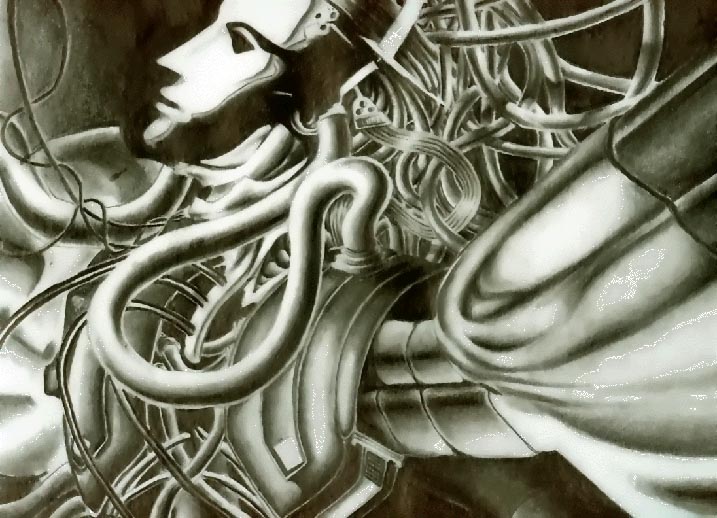
"Mechanical Angel"
Artwork by Deus
Jenova, Final Fantasy VII
Comments: This is the face of Jenova that Sephiroth pulled off. You know, the shell on Mt. Nibel. I like angels. You could look forward to more angels in the future.
|
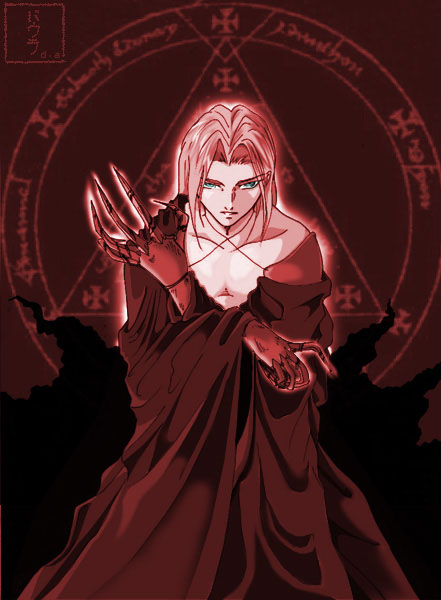
 Sydney Losstarot, Vagrant Story
Comments: So I suck with titles. Ahehe. Sorry. I was thinking of doing some Sydney fanart long ago, but the idea just got up and skipped away (happily, I hope). Good thing this commission came along, so I got reminded again to draw Sydney, and with good reason this time -- money! Ahaha! Just kidding. I'm not a money grubber *yeah right* Anyway! I didn't bother to erase the pencils from this drawing because I thought it added some character to it. Colored the pic with Copic Markers and Colleen Coloring Pencils (expensive markers, cheap pencils -- can't have 'em all, hehe). Sydney's black skirt-like thingie looks like it's about to fall off, but... The girls aren't complaining, are they? I know I'm not! Heee!!
|
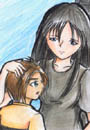
"The Beginning"
Artwork by Felix Leong
Squall Leonheart and Edea
Kramer, Final Fantasy VIII
Comments: This is the first time I ever drew a scene in a game, and this one is the one I liked most in FF8. (But I ended up being lazy to draw
the background of it ^^) I used my favorite mixed medium in coloring it (Color pencils and crayons). I drew the art during my leisure time and except for some glitches, it came out nice (I think). Note that this scene is from the ending of the game and has some slight spoilers inside...
|
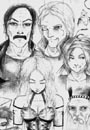
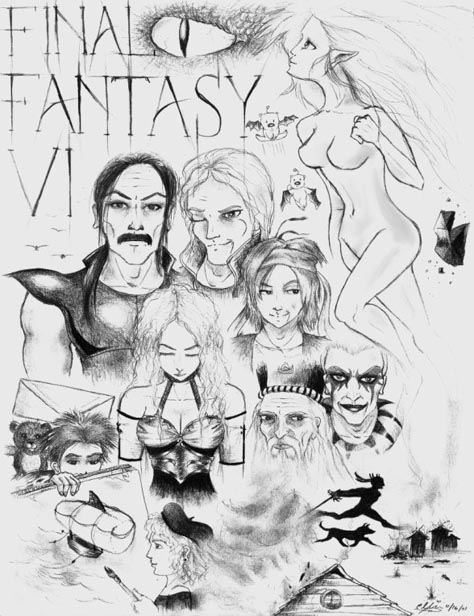
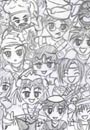
"A Motley Portrait"
Artwork by Kitt
(Nearly) Complete Cast, Final Fantasy VI
Comments: When I'm on campus I do less CG work and more pencil sketches... This is something that I started around September and didn't pick up on until recently (I nearly lost hope in it!). Unfortunately I couldn't fit in all of the characters, but I did my best. There are certain objects that represent unseen characters and objects close to certain characters that stand for an event in the game that involves them (all without blatantly spoiling a darn thing). I think I did a damn good job on Gestahl too ^_^ In case anyone's wondering, that would be a piece of Magirock besides the Esper Terra, to her right. And the smoldering village scene down in the lower right is actually the village of Maranda that Celes had burned before the game (note the tear on her cheek, kinda hard to see, but it's still there). This pic is also the first time that I drew Locke, Relm, Shadow (a silhouette but who's counting?), Gau, Gestahl, Kefka, and Edgar. It's not a perfect piece, but I'm rather proud of it.
|

"It's Eiko"
Artwork by Peggy
Eiko, Final Fantasy IX
Comments: Well.. it's Eiko as my -original- title says. =p
I don't know how to put backgrounds in correctly and that's why this looks like a big mess. heh. Oh well. I tried.
|
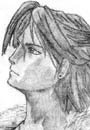
"Squall Leonhart"
Artwork by Rhyein
Squall Leonhart, Final Fantasy VIII
Comments: My first fanart for a videogame, I think he turned out rather well. Just used a normal pad and pencil. ^^;;
|
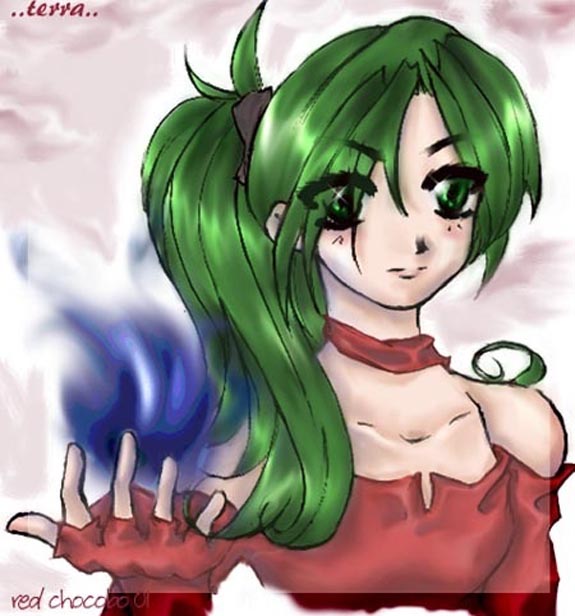
 Terra Branford, Final Fantasy VI
Comments: I drew this one about two months ago. It was my first picture colored using Photoshop 6.0. Despite my procrastination, I managed to finish this piece in a week, and learned many things about Photoshop while doing so. I chose Terra as a subject because, well, she's just darn cool. :P
|

"Dance Queen Farris
"
Artwork by Rumic
Farris (dancer job class), Final Fantasy V
Comments: This was "part" of my first pic colored with the
computer and my first submission to rpgamer. I said "part" because I had to
crop out Tifa and Terra (as not to offend anyone ^_^). Please don't be
offended by this drawing. ^_^ Anyways, I liked Farris from FF5. She was my
favorite FF5 character and seeing her in that dancer outfit blew my mind.
Those who played FF5 know what I'm talking about. That outfit they gave her
is soooooo out of character for her, it was just too cool! Anyways hope you
like it and e-mail me any tips, suggestions, or comments.
|
Revisions

"The Chrono Cross Family"
Artwork by Karen Ng
The entire cast of Chrono Cross
Comments: Finally got it colored and done! Izzit considered done?? Or it needs more improvement? I agree it sure looks much better with the colors added...heh heh. This is my first time doing this character medley thingy. Will try better next time...yeah =)
Director Comments: See the difference a bit of color makes? It looks really good, you've done great with your changes. As for whether or not it is done, only you can be the judge of that. You may have to come back many times, adding details and making small changes, but eventually you will look at your work and realize that it is how you envisioned it, and that it is done.
|
Tutorials
Aurora's Elly step-by-step Sketch
|
|
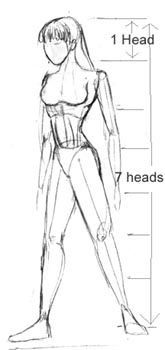
Part 1
This is where I start for a sketch. The oval for the head was drawn first.
From there I draw down, starting with the neck. I start out with an "upside
down" triangle for the body, and another for the hips. The arms and
legs are drawn starting with a line for bones, which approximate length.
Then I use an oval to flesh them out.
The entire figure should be 7 to 8 heads high, as shown. From the bottom,
the knee is at 2 heads, hips at 4 heads, waist at 4.5 heads, ribs at 5
heads, shoulders at 5.8 heads, and chin starts at 6 heads.
The distance from the shoulder to the elbow is about the same as that
from the shoulder to the waist. The wrist would rest at mid-thigh if the
arm was limp. Hands are usually a little smaller than the face.
Elly is a small woman with long legs. Her feet are a little longer than
I would normally draw on a woman.
|
 |
|
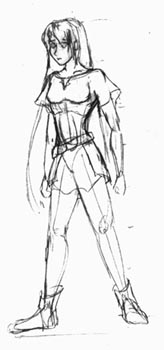
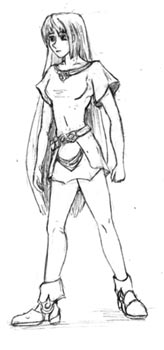
Part 2
At about this time, I wanted some specifics about Elly, so I looked in
my reference book, Xenogears Perfect Works. This book rocks. I
love it soooooooooooooo much. Of course, I also love the game, so, well...
anyway...
I decided to put her in a dress I saw her wearing in the sketches in
the book, and I also used it to get her haircut and facial structure.
So this step details the start of her clothing. Right now it's just drawn
on around the frame I drew in part 1. The dress has slightly flared sleeves
and a split skirt that only comes down to mid-thigh. A belt rests at an
angle on her hips, and her boots cover her ankles.
Her hair covers her forehead, and a long strand goes over her ears. Right
now her face only has vague details. I put them in to hold the location
of her eyes, nose, and mouth. I also put a general sketch of her long
hair in.
I changed the body slightly when I got to the clothing. For instance,
her shoulders were too broad, so I moved her left one (on our right) back.
I also slimmed down her neck, moving the line under her chin a bit to
the right.
|
 |
|
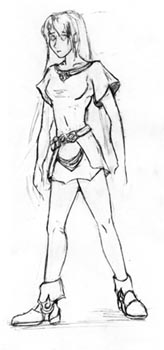
Part 3
This is when I started cleaning up the picture. I worked from the bottom
of the page up, though I probably should have started high. The pictures
look much cleaner than the paper did because Photoshop has a wonderful
feature called "Adjust Curves" that allows you to fix the contrast
in a picture like this.
I erased the lines that wouldn't be seen at this point, like most of
the muscle detail on her body. I put more detail into the dress (the collar-piece,
for instance), and the boots (those neat circles near her ankles). I adjusted
the split around her hips to fit her butt closely, and I started shading.
Her belt isn't done very well, nor is the little flap beneath it. I sort
of fudged the sketches around there, because I wasn't sure what they were
supposed to be.
|
 |
|
Part 4
Now for the bane of my existence as an artist: hands. They're wonderful
to work with, but they're hell to actually try to draw. I mentioned this
while drawing and the people around me were quick to point out the other
things they have problems with: noses, mouths, and feet. There are only
a couple of ways to get these right. One is with a picture or a model,
if you can draw from a picture or model. I can, but I didn't have Elly
around to pose for me, so that didn't help. The other is lots and lots
of practice. At some point I'll try to do a hand study in the tutorial.
For now, the best thing to do is to notice that the thumb starts at the
wrist, and comes out from the rest of the hand. If you're having problems
drawing hands, take at look at your own and notice how they move. Wiggle
them around a little. Chances are that you're not putting the bones in
the right relative positions.
I also finished Elly's face. Her nose is the classic little anime point,
her mouth is a straight line, and almost all of the detail comes from
her eyes, which are large (of course). Since the face is so small in relation
to the body, it's hard to see the details that are put in. There are two
ways to deal with this: Put in all the details and have it highly appreciated
when people look close (hard with a computer scan) or fudge it. I think
I did lots of details, but it would look the same as if I fudged it.
The picture could be done now, but I wanted to add color.
|
 |
|
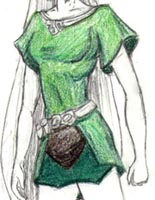
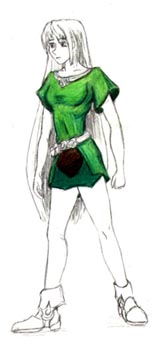
Part 5
Now I've started adding color. I was using colored pencils here, because
I like them and because I have a lot. I also sometimes use chalk pastels,
oil pastels, and acrylic paints, but none of them would have worked for
this picture because it isn't very big (about 6"x14") and it's
on 50 lb. paper, not canvasette. I use Prismacolor colored pencils. They're
very good quality, blend well, and there's a large variety of colors.
They are, however, a bit expensive compare to something like Crayola.
I decided to make the dress green, because it offsets Elly's hair (which
is orange). I only had about 3 different shades of green, but as it turns
out, that's enough. I used a darker green first, for the shadowy parts
of her dress. These were the insides of her sleeves, near her sides, under
her arms, etc. I used the other two shades to make a gradient of color.
The highlights are near the top, because the light source is from above.
I made the little triangle over her lower abdomen brown because my friend
said it reminded her of a piece of leather, and that worked. The little
under skirt is a made of the dark green blended a little with the lightest
green I was using, to make it a different color from the rest of the dress.
|
 |
|
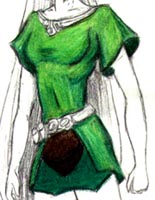
Part 6
The difference between this picture and the one above it is the use of
the colorless blender that Prismacolor makes. It is a wonderful, wonderful
thing. Check this out:
See the difference? The yellow greens are brought out, and the colors
look much more vibrant. I like it very much. It makes the picture look
very smooth.
Now, of course, there are a couple of ways to do this if you're using
pencils or colored pencils. The colorless blender is, as far as I can
tell, a pencil of clear wax. You can also use a white colored pencil,
though that tends to give the colors a paler tone. Additionally, you can
use a blender to smooth your lines. Blenders are hard to describe--they're
little rolls of paper that you can buy at art stores. The work nicely,
too.
|
 |
|
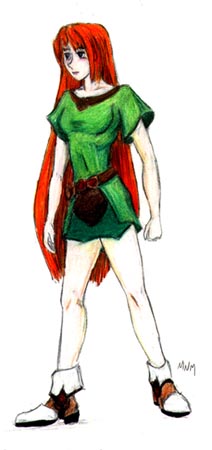
Final Picture
And this is the final product. Her skin is appropriately pale, her eyes
are blue, her hair is very orange, and I think it looks reasonably like
Elly.
The top of her dress is supposed to be metallic. Rather, it is metallic
gold and copper, but it didn't scan in so well.
I think the piece came out pretty good. There are, of course, a couple
of problems. Her hands are a little small, and there are a couple of stray
lines on her legs that look weird. Her hair is a little rushed and blurry.
The biggest problem that strikes me is that her feet are at the wrong
respective places on the floor. Since the left foot (on our right) is
further forward by the position of her legs and hips, it should be lower
down on the page. For it to be where is, the left foot should be on it's
toes, not flat on the ground. Also, her left knee should be more bent
than it is.
As it is, it's a very good picture if viewed from the bottom of her hair,
up.
- Aurora, of Techstyle Engineers
|
 |
|
Shards

|
Dark eyes looking away now
|